Quickstart (Cloud Hosting)
Deploy Nexgent to production in minutes using Railway's one-click deployment template. No complex configuration needed—just a few clicks and you're ready to trade.
This guide covers cloud hosting deployment. For local development setup, see Quickstart (Local Dev).
Prerequisites
Before starting, ensure you have accounts for:
- Railway account (sign up (opens in a new tab)) - For hosting
- Jupiter account - Create at portal.jup.ag/api-keys (opens in a new tab) - For API access
Both services offer free tiers, so you can get started at no cost.
Setup
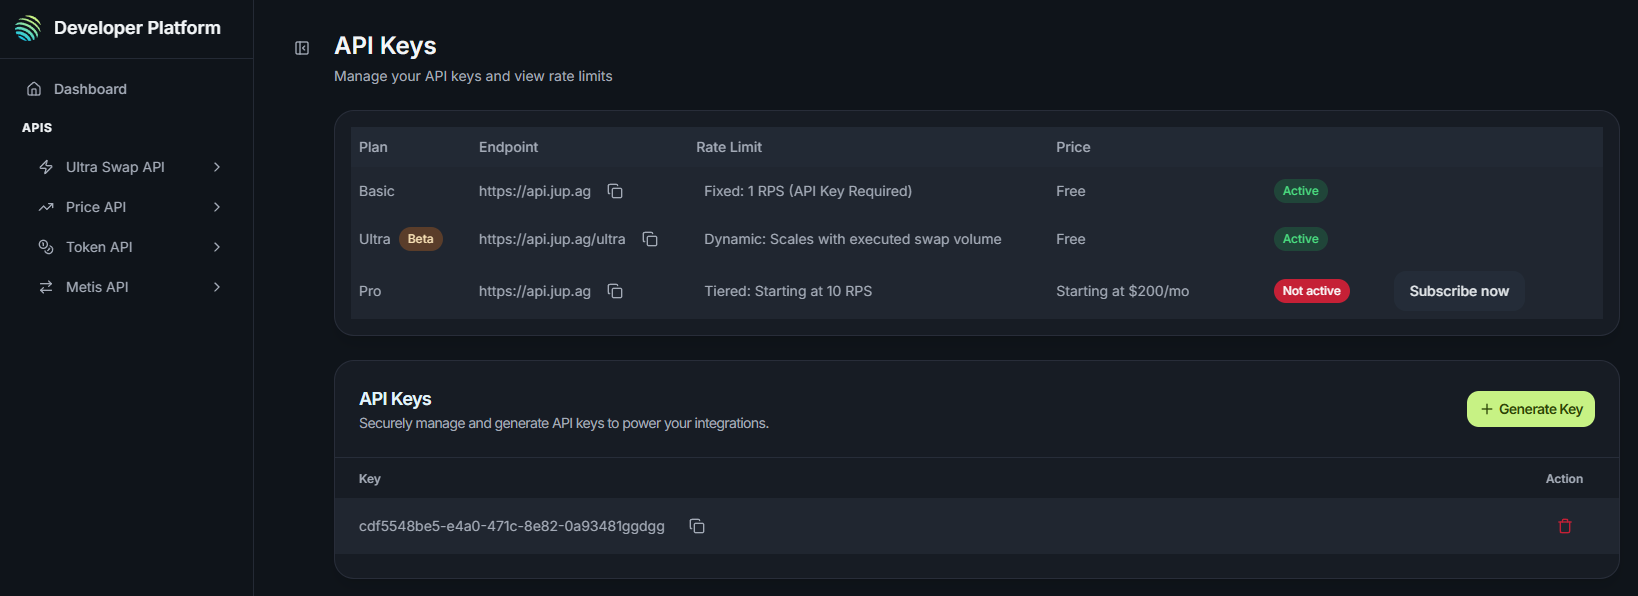
1. Get Your Jupiter API Key
- Go to Jupiter API Portal (opens in a new tab) to create an account
- Once logged in, click Generate Key to create a new API key
- Copy and save your API key - you'll need it in the next step
2. Deploy with Railway Template
-
Click the Railway deployment template: → Railway deployment template (opens in a new tab) ←
-
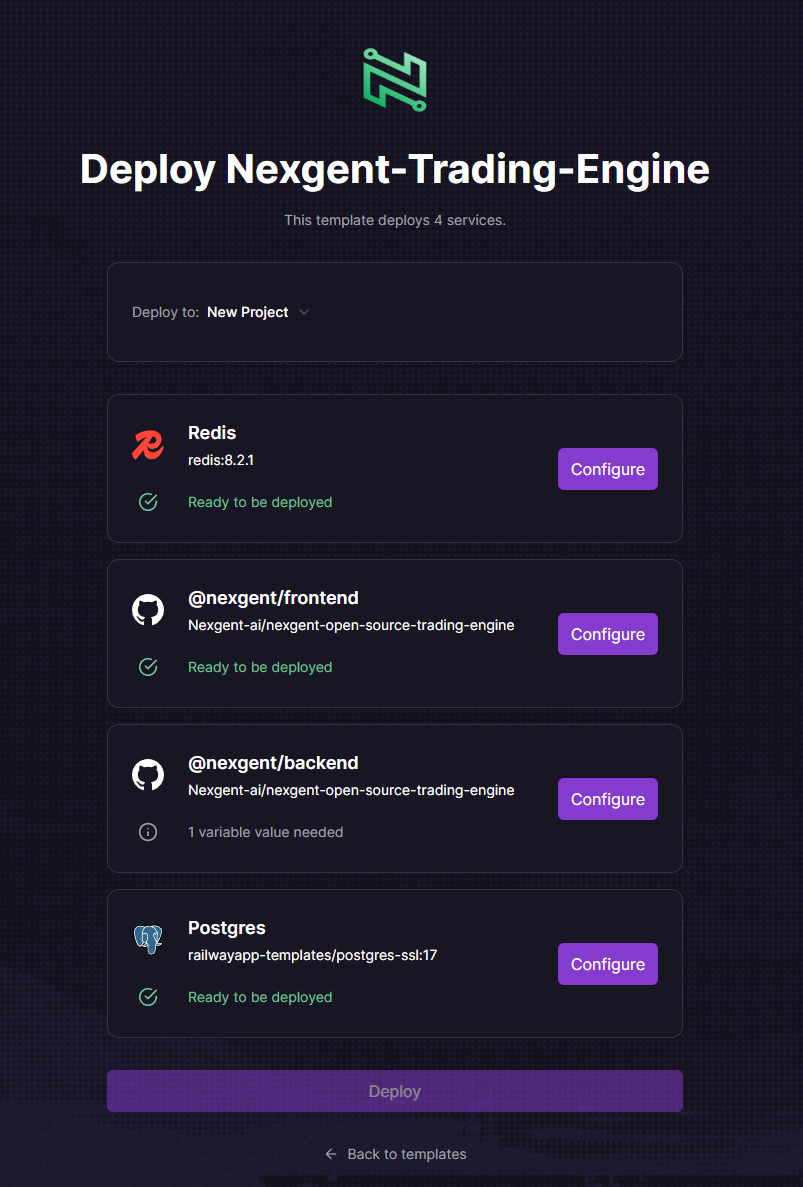
Railway will prompt you to:
- Sign in or create a Railway account (if not already signed in)
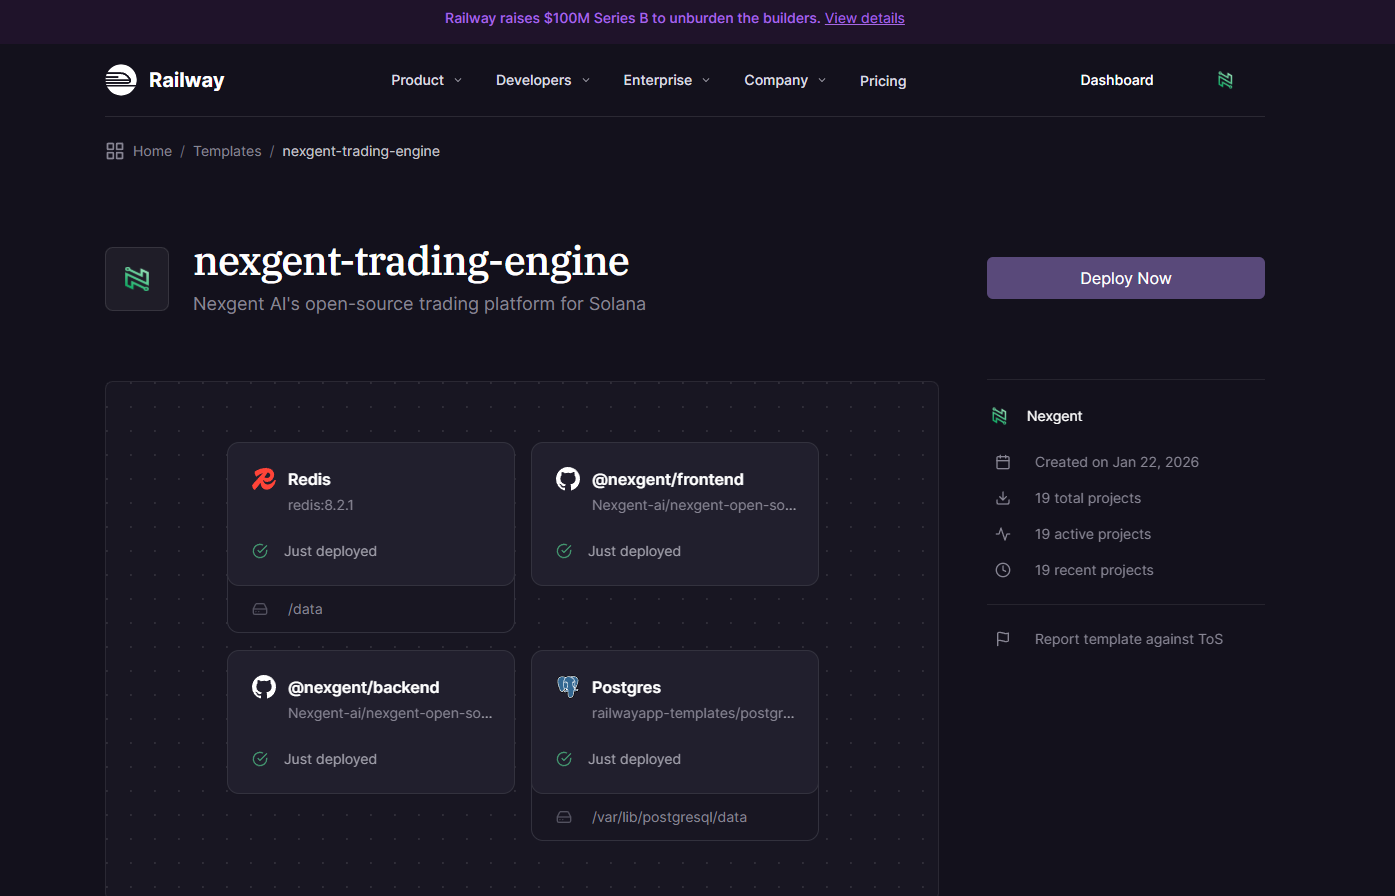
- Railway will automatically:
- Create a new Railway project
- Set up all required services (PostgreSQL, Redis, Frontend, Backend)
3. Configure Environment Variables
- In your Railway project dashboard, you'll see the deployment in progress
- Once the services are created, click on the nexgent-open-source-trading-engine/backend service
- Go to the Variables tab
- Add the following variables:
JUPITER_API_KEY— Paste your Jupiter API key from Step 1ADMIN_EMAIL— Your login email for the Nexgent dashboardADMIN_PASSWORD— Your login password for the Nexgent dashboard
- Click Add to save each variable
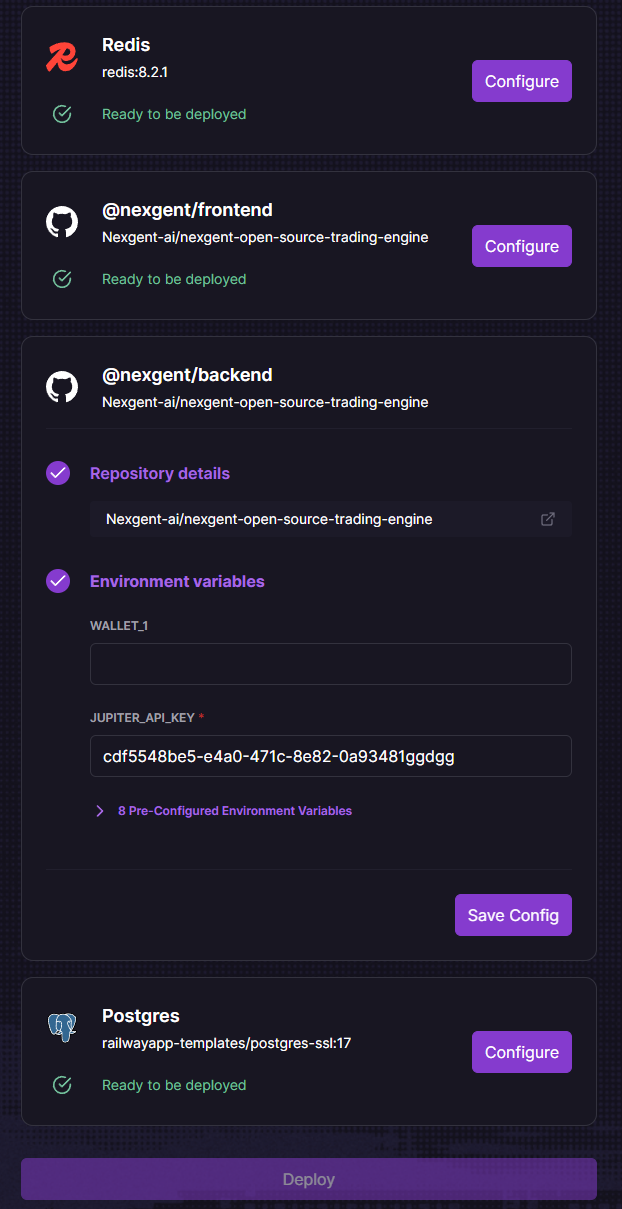
The template automatically configures PostgreSQL, Redis, and other required services. You only need to add the Jupiter API key and your admin login credentials.
4. Deploy
- Railway will automatically start deploying once you've added the required variables
- You can monitor the deployment progress in the Railway dashboard
- Wait for all services to show "Deployed" status (usually 2-5 minutes)
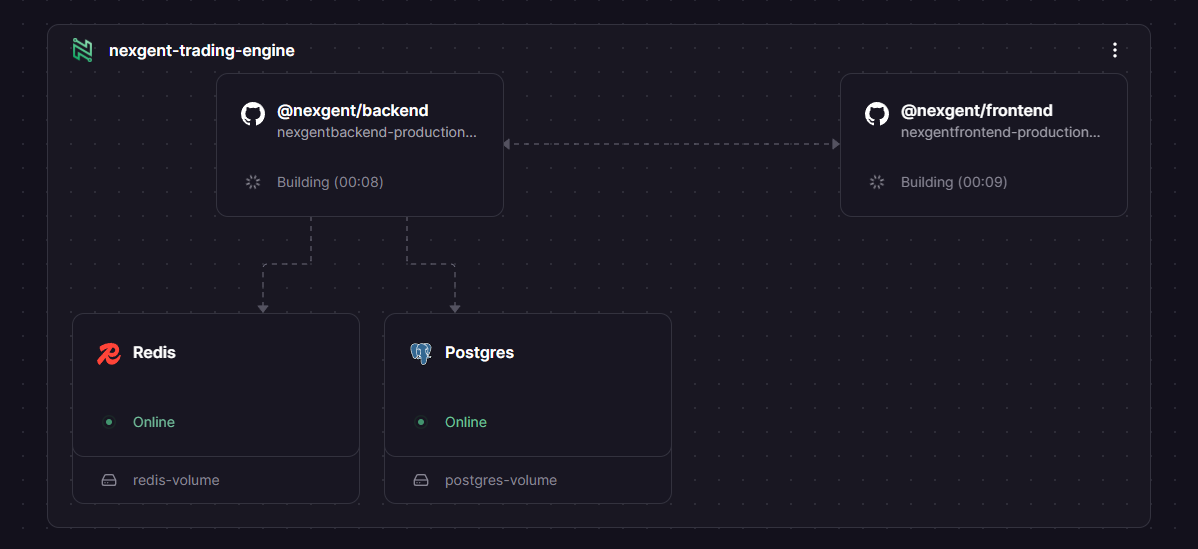
What's being deployed:
- PostgreSQL - Database for storing trading data
- Redis - Cache and job queue
- nexgent-open-source-trading-engine/backend - Express API server
- nexgent-open-source-trading-engine/frontend - Next.js dashboard
5. Access Your Dashboard
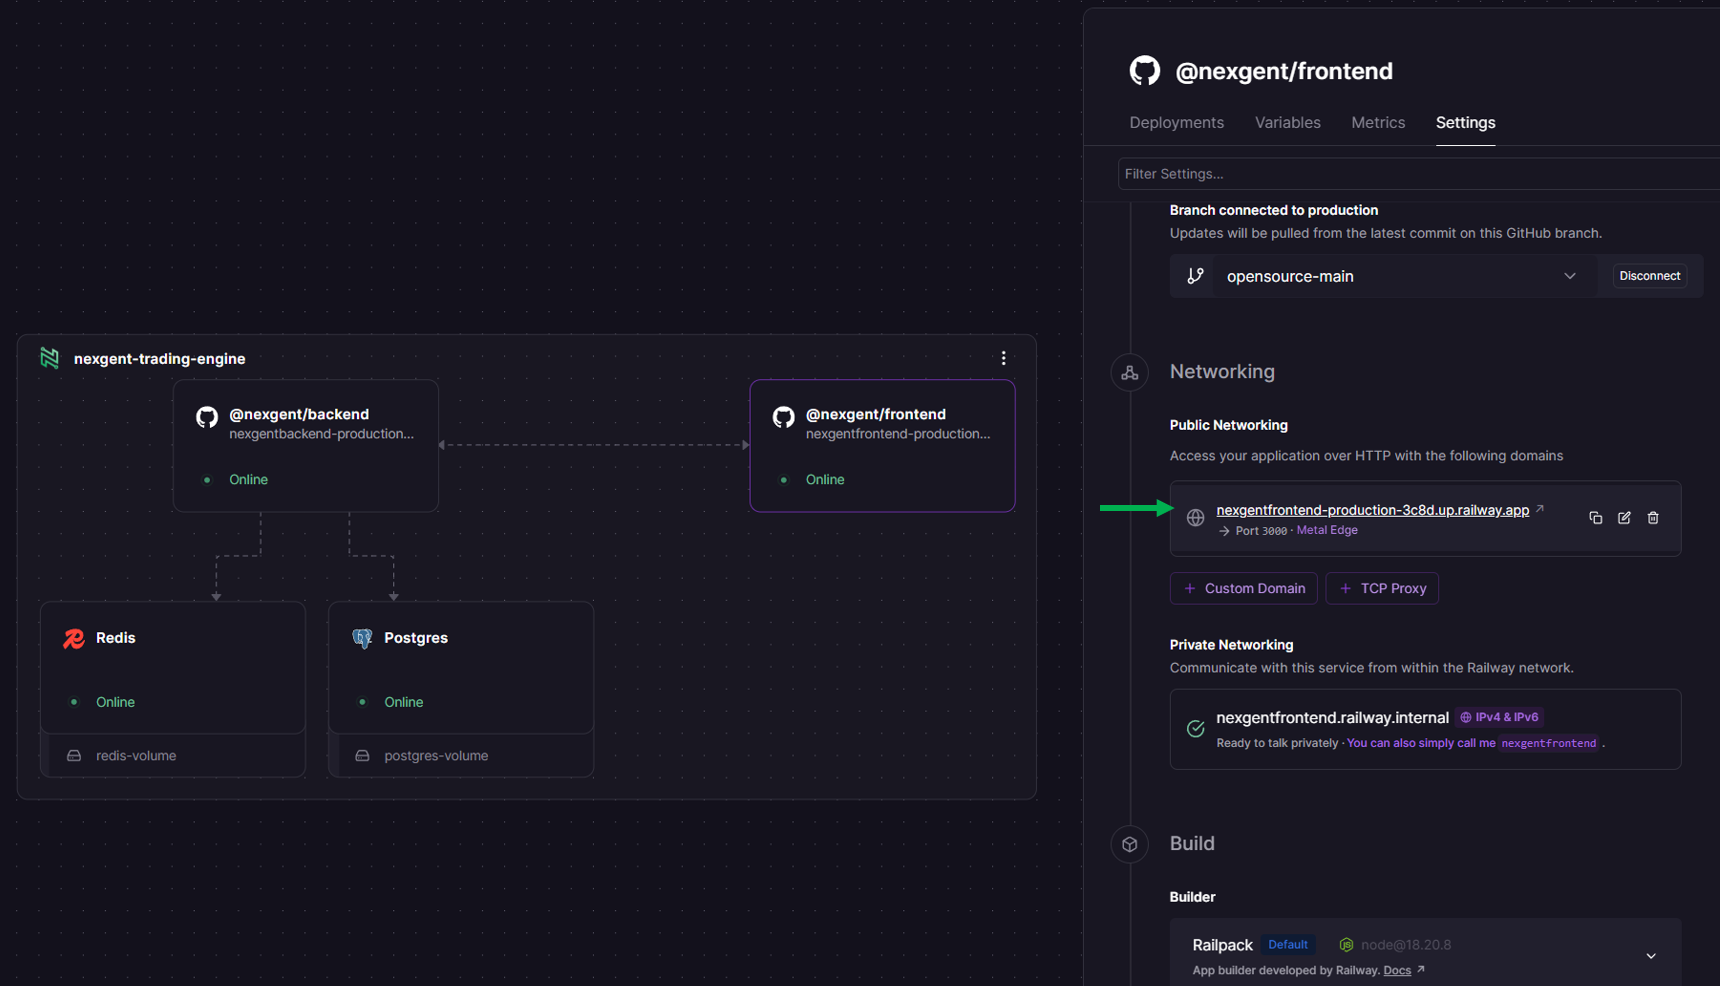
- Once deployment is complete, click on the nexgent-open-source-trading-engine/frontend service
- Go to the Settings tab
- Find your Public Domain (e.g.,
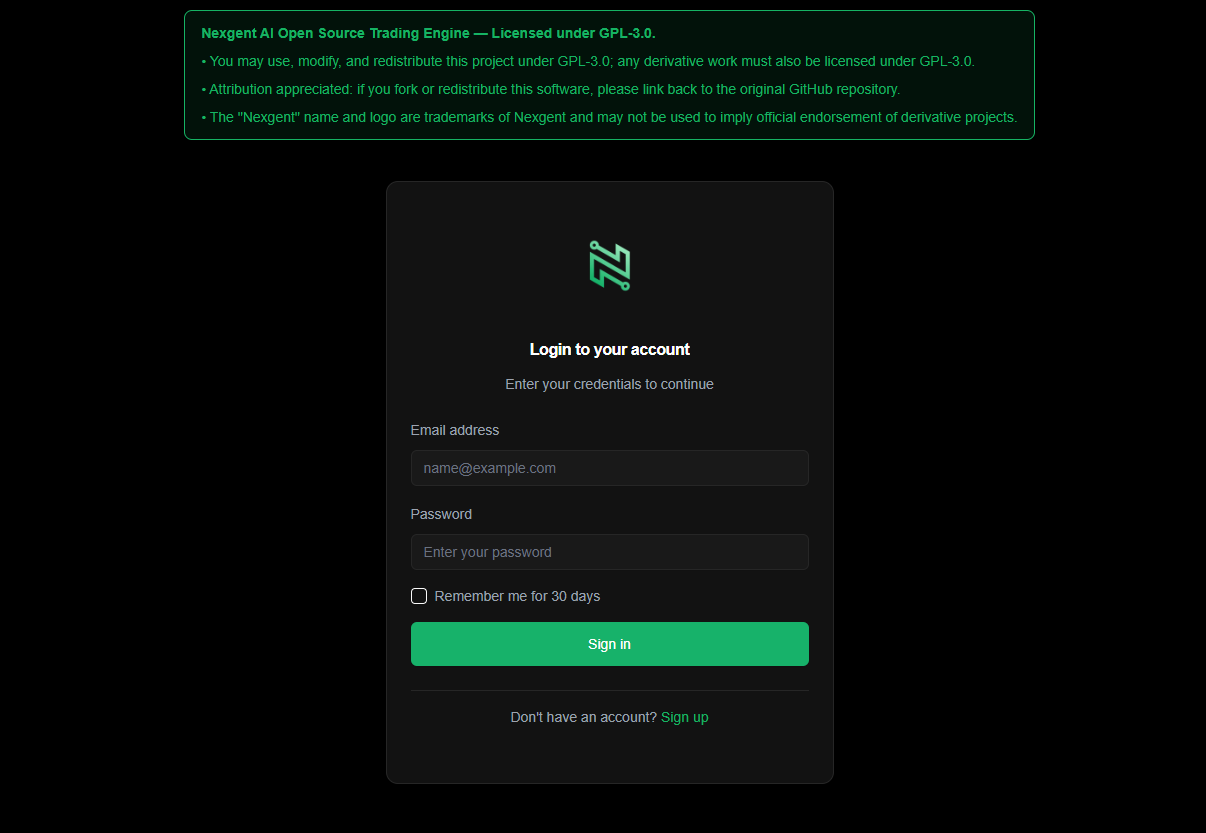
your-app.up.railway.app) - Click the domain to open your Nexgent dashboard in a new tab
You're done! 🎉
What's Running
After deployment, Railway automatically sets up:
| Service | Purpose | Managed By |
|---|---|---|
| PostgreSQL | Database for users, agents, positions | Railway |
| Redis | Cache and job queues | Railway |
| nexgent-open-source-trading-engine/backend | Express API + WebSocket server | Railway |
| nexgent-open-source-trading-engine/frontend | Next.js dashboard | Railway |
All services are automatically configured and connected. No manual setup required!
Adding a Live Trading Wallet
To enable live trading, you need to add your Solana wallet private key:
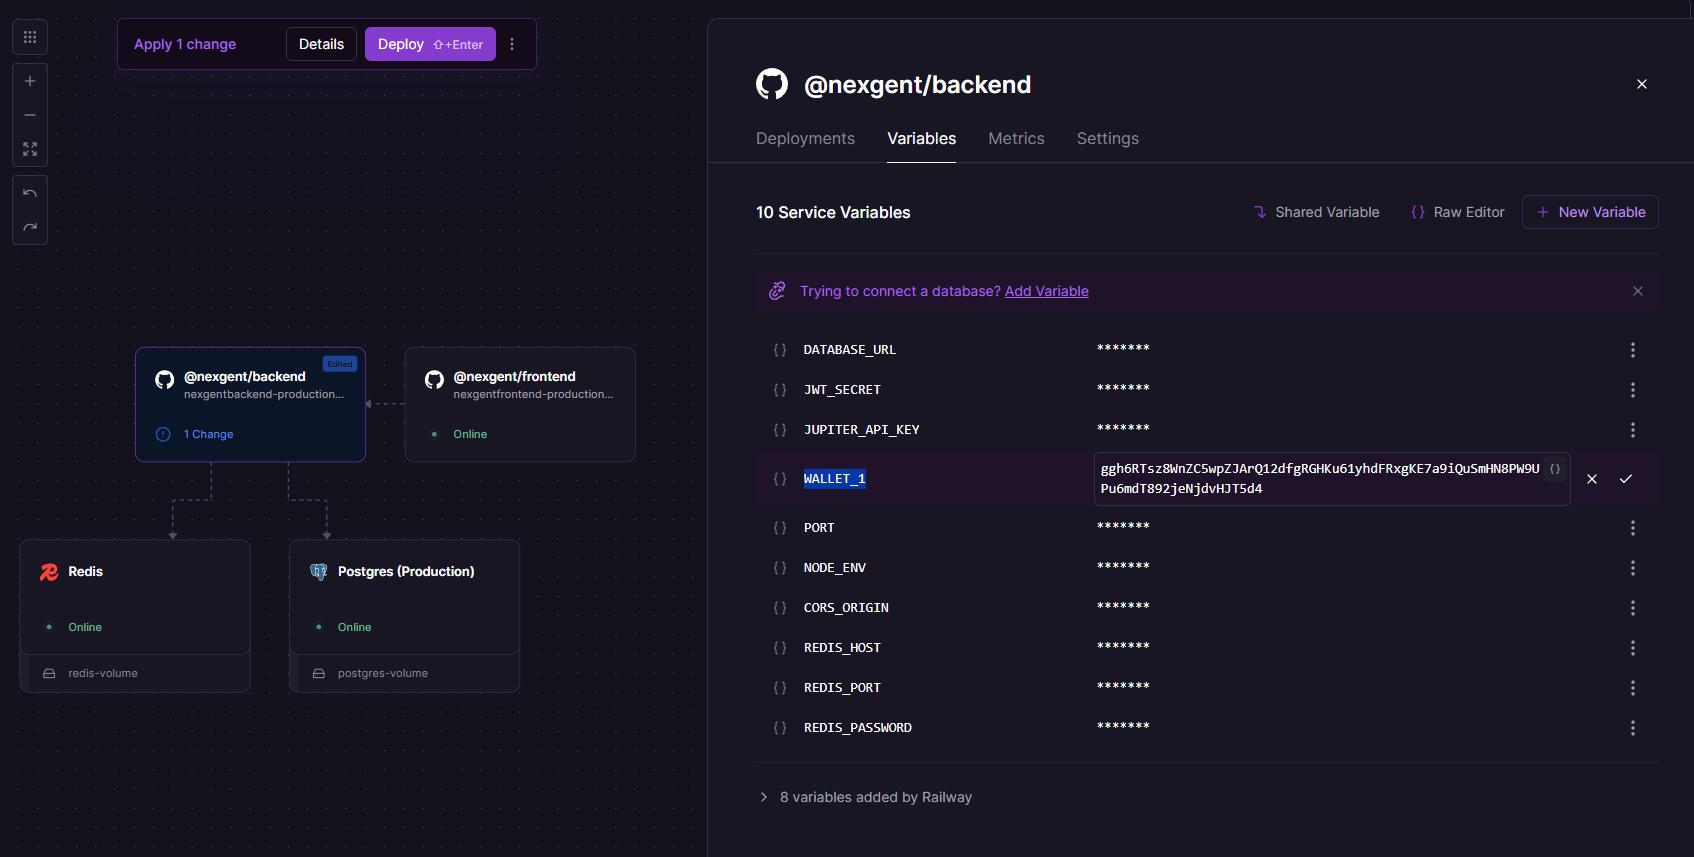
- In Railway, click on the nexgent-open-source-trading-engine/backend service
- Go to the Variables tab
- Add your wallet private key:
- Variable Name:
WALLET_1 - Value: Paste your Solana wallet private key
- Variable Name:
- Click Add to save
Multiple Wallets
You can add additional wallets by creating more environment variables:
WALLET_2for a second walletWALLET_3for a third wallet- And so on...
Deploy Changes
After adding or modifying wallet variables, you must redeploy for the changes to take effect:
- Click Deploy in the Railway dashboard (or the service will auto-deploy)
- Wait for the deployment to complete
- Your wallet will be available for live trading once the deployment finishes
For simulation mode, wallets are not required. Only add wallet private keys when you're ready for live trading.
Custom Domain (Optional)
To use your own domain:
- In Railway, click on the nexgent-open-source-trading-engine/frontend service
- Go to Settings → Networking
- Click Add Custom Domain
- Enter your domain (e.g.,
app.yourdomain.com) - Follow Railway's DNS configuration instructions
- SSL is automatically provisioned
Repeat the same process for the backend service if you want a custom API domain.
NGINX Reverse Proxy + Basic Auth
We recommend putting your application behind an NGINX reverse proxy with Basic Authentication for additional security.
Cost Estimation
Railway offers 30 days free to get started. After that, hosting costs $5 per month.
The free trial gives you plenty of time to test Nexgent. After 30 days, you'll be charged $5/month for hosting.
Deploy to Other Providers
This quickstart uses Railway for the simplest one-click deployment. The Nexgent open-source trading engine is provider-agnostic—you can deploy it to any cloud or server that supports Node.js, PostgreSQL, and Redis.
Other deployment options
| Provider / method | Best for | Setup effort | Docs |
|---|---|---|---|
| Docker Compose | Dev, testing, or a single server (VPS, bare metal, or any cloud VM) | ~15 min | Docker Compose |
| VPS (DigitalOcean, Linode, AWS EC2, etc.) | Full control; you manage Node, Postgres, Redis, and reverse proxy | 1–2 hours | VPS Deployment |
What you need on any provider
- Node.js 18+
- PostgreSQL 14+
- Redis 7+
- Environment variables for database, Redis, JWT, Jupiter API, and (for live trading) Solana RPC and wallets
For step-by-step guides, architecture details, and production checklists, see the Self-Hosting Overview.
Troubleshooting
Deployment Fails
- Check Railway logs: Click on the failing service → Deployments → View Logs
- Verify variables: Ensure
JUPITER_API_KEY,ADMIN_EMAIL, andADMIN_PASSWORDare set correctly in backend variables
Frontend Shows Error
- Check backend is running: Verify the backend service shows "Deployed"
- Check environment variables: Ensure all required variables are set
- View frontend logs: Click on frontend service → Deployments → View Logs
Can't Access Dashboard
- Check public domain: Ensure the frontend service has a public domain enabled
- Check deployment status: All services should show "Deployed"
- Try incognito mode: Clear browser cache and try again
Database Connection Errors
- Check PostgreSQL service: Ensure it's running in Railway
- Check backend logs: Look for connection errors
- Verify migrations: Backend automatically runs migrations on deploy
Updating Your Deployment
You can trigger manual deployments from the Railway dashboard:
- Go to your Railway project
- Click on the service you want to update
- Go to Deployments tab
- Click Redeploy to trigger a new deployment